Showing posts with label DIY. Show all posts

Oct 3, 2016

The Not-So-Halloween Decoration

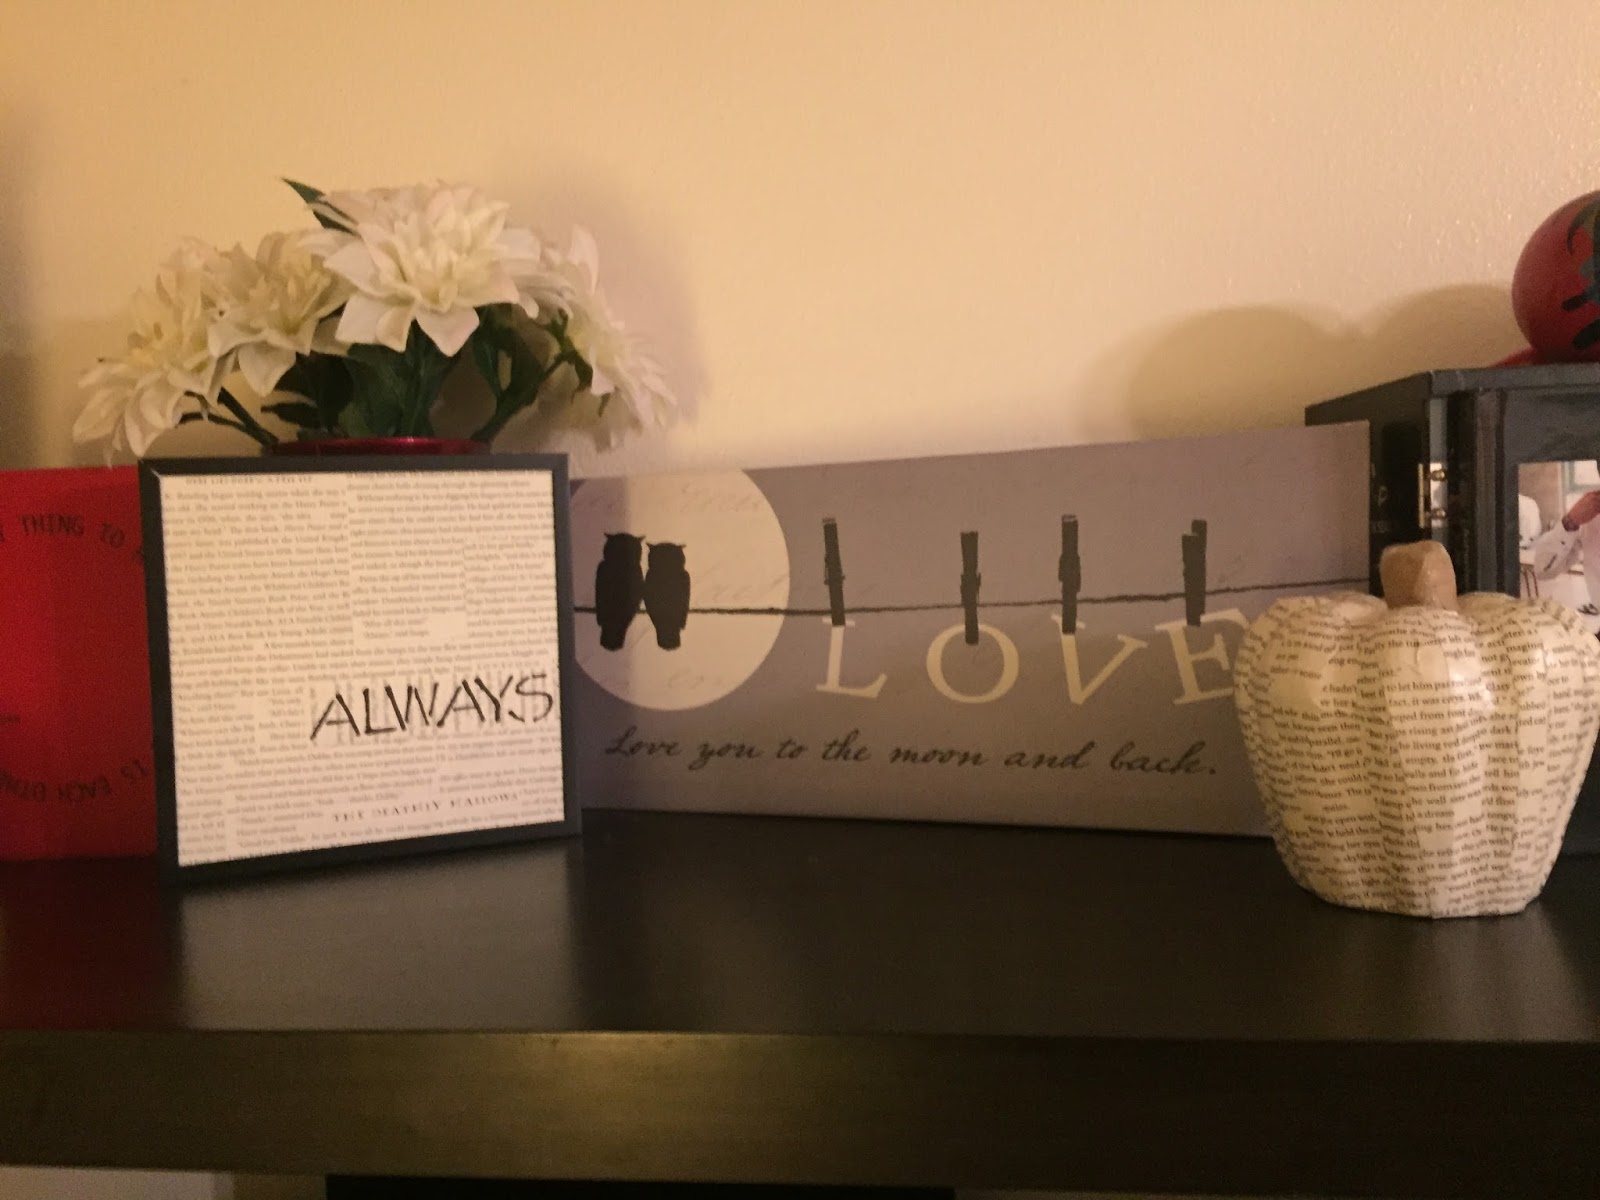
I frequent Target stores a few times a week. Like many, I spend plenty on each trip. That is why I kept passing the opportunity to buy this cute black-framed square Halloween art. It was only $3, but I waited, and now it's gone from my local stores. They don't sell it online. I don't even have a picture of the original decor.

It was a stand alone square with what appeared to be book page collage on the front and "trick or treat" printed in black over the book pages.

For the price of free (because I had all of these things already) I made my own. It started out as an idea of replication, then evolved into something better. I selected some of the best moments from HP The Deathly Hallows. Then after debating between trick or treat, thankful, fall, and boo, I decided on "Always". Duh right?

Now I have year-long decor but it looks nice for October too. :P
[ My actual HP book was not harmed for the project. It was a used copy from Goodwill ]


Nov 18, 2013

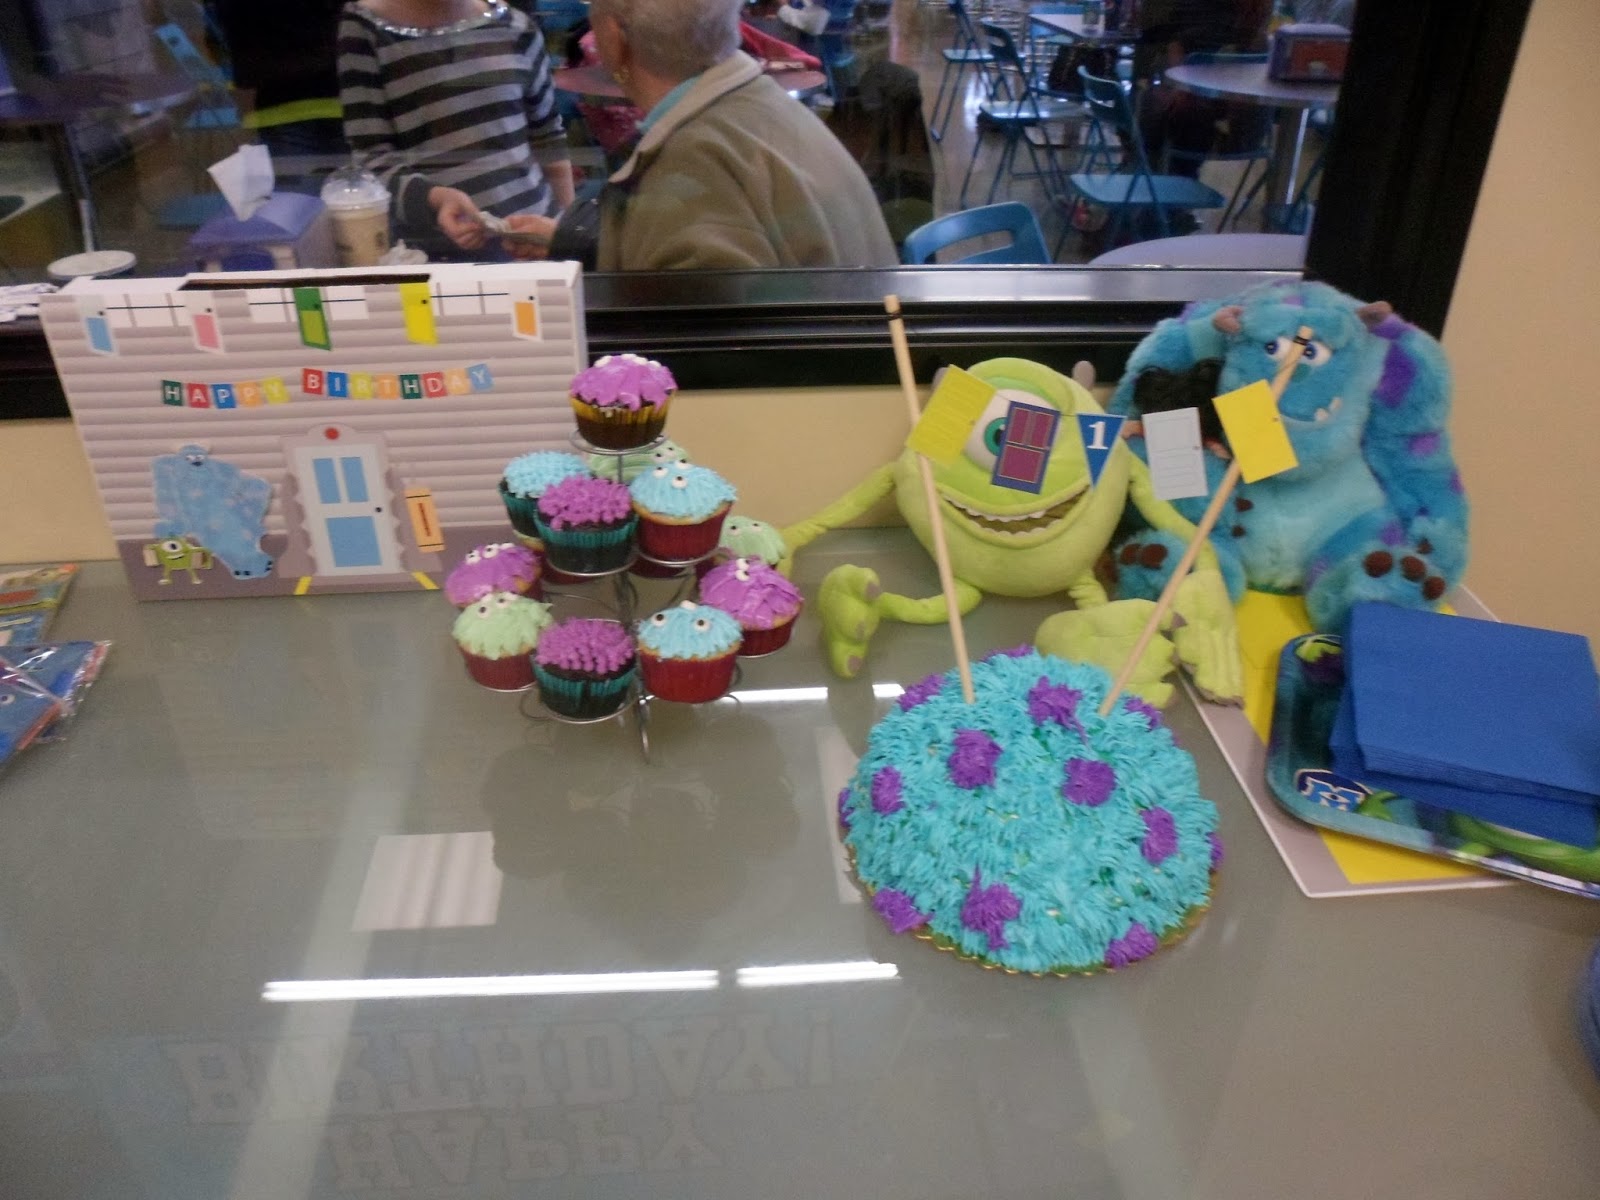
Monster's University - 1st Birthday Party

I love hosting parties. Scratch that, I love decorating and creating all kinds of paper goodies. Is that the same? In any case, my son’s first birthday was a lot of fun for me. I had the theme picked out when he was six months old. I can’t take full credit for it. My brother had the idea to have a birthday party for my nephew that was themed around Mason going to college. I made invitations with Mason wearing a graduation cap laid over a diploma. For gifts (while not required) guests brought money to contribute to his college fund. My own son has plenty of toys and doesn’t know the difference so I decided to copy this idea. Lucky for me, Monster’s University was released this year. Tie the two together and everyone thinks I’m a genius.

For months I kept my eye on the dollar spots at all sorts of stores. There where Monster’s University stuff everywhere to promote the movie release. I scoured Pinterest for ideas. Most were related to the original Monster’s Inc. movie because the University edition was still quite new. I wish I could say I’m so creative that I thought of everything myself. Thanks to Pinterest no one has completely original ideas. We all inspire each other.


I really held back. I didn’t want to get out of control with decorating, especially since I have two older kids that have had very simple parties in the past. I’m sure they will expect more extravagance if they see it for their brother. I love how it turned out and everyone who came had a good time. 


Invitation


Card box, Monster cupcakes, Cake

Monster Photo Booth Props, Monster's Student ID Cards, Scream Canister Party Favors

Monster Booth

Monster Booth

Smash Cake. We pulled out the doors and used a candle when it was time to sing.

Nov 1, 2013

The $7 Costume + Tax

My costume for Scary Sherri's Halloween Bunko party was under $10 this year. If I didn't already own mod podg, an exacto knife, foam brush, and duct tape then it would bump up a little bit.

Someone sent me a photo on Facebook of a girl dressed as a"Diction-fairy". Her wings were dictionary pages pressed out of the dictionary on her book. I found several variations of this costume online after seeing that picture. Needless to say, my costume is not an original. What is anymore?

I decided to be a "Fiction-Fairy," spreading the joy of reading to others. My cousin Jel would mock me because I don't read books, I read on my kindle. I am a traitor in her eyes. LOL

Costume Materials:
* Fairy wings from Dollar Tree $1
* Book from Goodwill $6
* Mod Podg
* Foam brush
* Duct tape
* Exacto knife


Of course I used Harry Potter
The glue seeps through so have a page underneath first. Sponge on glue and add the page on top. Press flat. Do multiple layers at different angles.
I didn't take a photo of adding the book to wings. I ripped out all of the pages from the spine, then used mod podg and duct tape to secure it. I placed book pages over the inside to cover the tape.


I also didn't catch a good photo of me holding my book mark wand. Lame, I know.

Sep 28, 2013

Halloween Wreath DIY

I found a Halloween wreath on Pinterest that I knew I would actually take the time to create. We all pin things to our boards and promise we will follow that same genius idea, then we don't. Today I went to Michael's and spent about $20 on materials. The whole process took me about two hours but I took a couple of breaks to grab my son. You know, so he didn't reach the kitchen knives. It would have taken three times as long if I wasn't at Grandma's house. I recommend doing this when the kiddos are gone or asleep. Although, if you have a cat, you'll have to tie a piece of tulle in a knot for them. Otherwise they sit and paw at your stuff constantly.


What You Need:
12" foam ring
2 spools black tulle
Assorted flowers and decor of your preference
Scissors
Hot glue gun

To find the right length, wrap the tulle around the ring twice to fully cover the green, and leave the ends to stick out at the desired length. You can cut the pieces all the same length like the original creator mentions on this blog post. I started making them the same length but then found I liked a random mix of lengths. Wrap each piece around twice, tie in a knot, and scrunch them together. 


Wrapping the ring completely took about an hour. I liked having the ends stick straight forward toward me rather than out to the side like the original tutorial. 


Fluff it up however you'd like.


Add the pretty pieces. I got lucky at the store today. The flower is a clip and the owl and pumpkins are both picks. I was able to attach them without hot glue simply by tucking them into the tulle wraps. At the end of the season I can take them off and store them separate.


Add some ribbon and hang it on the door. Voila! Easy. I don't tie pretty bows so I didn't try it. Happy Halloween!


Nov 13, 2012

Grayson's Baby Suite, Part Two

My son, who will arrive in three "short" days, finally has a "bedroom". I use the quotations in the way a person would use air quotes to note sarcasm. Three days isn't short for the person carrying the baby who had pain in their back, wrists, arthritic hand and the lower lady regions. Bedroom is in air quotes because we don't have room to give the smallest person in our family their whole room. He could share with his big brother however at this age that isn't necessary. They'll share when Grayson is big enough to sleep alone in a big boy bed. (Maybe sooner if he drives me crazy in my room)

First let me tell you that I am no swanky designer and won't pretend to be. I also don't have a fancy camera so even though these will go on my pinterest boards, they aren't pinterest photo quality. I am just a working, school attending, mother of almost three who really misses the HGTV show Design on a Dime. There is no better interior designer than Lee Snider. I hope I spelled his name right.

I definitely put Grayson's suite, a.k.a. nook in our bedroom, together on a dime. I was able to pull it off for less than $500. I didn't actually spend that much because the crib and mattress were a gift from my in-laws. The dresser, and the shelf were a gift from my parents. But I bought the curtains, frames, material for the quilt, crib sheet (Organic and only $19 at PotteryBarnKids.com), and the glider chair. I was lucky to get the chair used for cheap from a friend. I couldn't fit the glider inside his small space but it sits right next to it. We spray painted it black and covered the cushions with soft gray material. We used the excess gray material for the back of the quilt. We meaning, my friend Mimi who sewed it for me. You may have seen the previews of that from Part 1 of this project.

It's not a large space, but it's made with love and belongs to our new son Grayson Charles. Mom and dad love penguins and I am glad that we were able to create a penguin theme for his space because there just isn't a penguin nursery set out there that fits for us.

The whole baby suite, face on.

Photos/quotes from "March of the Penguins" altered in Photoshop.

Right side of the suite.

Crib with quilt and sheet. No bumper.

Refurbished glider with pillows I already owned.

Perspective from our bed looking at his suite.

Oct 30, 2012

The Book Themed Baby Shower

Library Book Inserts as Invitations
I had a big hand in my baby shower planning. My mom and aunt who were the actual planners would tell you that it’s because I’m a control freak. True that may be however mainly it’s because I love party planning. I haven’t done it professionally, and I’ve never done it with a huge budget or with my hours being paid for. The events are always bigger and better in my brain than when they are executed. My baby shower was an exception however.
 
I’ll start with the theme. Before I knew he was a boy, and therefore would be named Grayson, I knew I wanted to have a gray baby shower. The name Grayson is coincidence I swear. I had googled party images and the grays were always my favorite. So now I needed an accent color and I just loved the idea of orange. Many months ago I saw some pictures of a Harry Potter party and absolutely loved that idea. However it was revised because one, that’s not a baby book, and two because not everyone attending would understand.

So we decided on a book theme shower. There were hardly any touches of “baby” to be seen. I wanted to skip the typical baby bottles and carriages used for décor. I’m just not into typical anything ever. The touches of “baby” were tiny gray baby blocks stuffed into the napkins at each setting, as well as baby photos of me, dad, and our own kids. Everything else was made from books: heart confetti from pages, stacked books as a vase for flowers, book “fans”, book page placemats, book page name banner, book page vases, and other tiny touches. A lot of the ideas came from pinterest and can be found on my board here Shower Inspiration Board.

Like I said, it turned out better than I had thought. I put off doing anything baby shower until after my friend’s wedding. I didn’t want to switch gears in my brain until it was over. So that left us with one month to DIY everything. In that month I was pregnant and going to school on top of caring for two kids. Little time was left for me as well as my mom and aunt to meet together and craft up the décor. While facing those challenges, the fact that it still came out so beautifully leaves me so pleased.

I painted Harry Potter on the Cake.
My friend Brittany baked a two layer stack of books cake. I painted a Harry Potter for the cover. It was the pose from Order of the Phoenix if you’re curious, one of my favorite books. I am lucky to have a friend who likes to bake.

The games were a hit! We only played two because I’m not big on the games, but they were great. One was alternate book titles. I made them up to look like books for each guest however there is a free printable of it online Alternate Titles Game. We also played a game of “Mom or Dad”. I had my mom and mother-in-law tell me stories about me and dad. The cards were made to look like bookmarks and  guests had to guess he or she for each story. Some of the stories were hilarious and some were embarrassing. It was funny to see their faces when they learned that I was the one who used to trade toys everyday on the playground in second grade.

Can I say again I’m happy with how it turned out? I am so happy with how it turned out. I had a great turn out of family and friends in attendance. Appearance wise it was awesome. The games were fun. We received plenty of needed items for Grayson, and I was able to destroy and then re-use books that were wasting space in my closet in a box. I’m a proud kindle owner and therefore was happy to use my books for something more useful than sitting. (Of course I have kept my HP books. Those are special.)

The book vases were so pretty that I kept one as décor for fall in my home.


Aug 22, 2012

She's Almost a Housewife


By definition my friend Aleigha will not be a housewife when she gets married. She’ll take her honeymoon and like many modern wives, will return to work. She will work outside and inside the home of course. Mom’s/Wives never get a break!

I had a great time planning and executing her bridal shower. I admit that I love being a Matron of Honor. It’s exciting to assist the bride in her planning. I spent a year planning my own and then immediately began on hers. It’s been a fun ride. Much more enjoyable since I am not the one paying this time.

With a little more money I could have really ran with this shower theme. I had a million ideas stewing in my head but couldn’t really execute everything I had envisioned. Lucky for me, the bride-to-be didn’t find the event lacking.

Housewife Invite
The games were kept simple. To start we played “Famous Wives” game. Everyone had the name of a famous wife pinned to their back and they had to ask other guests questions that would help them guess who their famous wife was. I was the last to guess correctly despite having made the cards. It was funny to learn what people around me thought of my wife, Madonna. It was great for mingling at the start of the party.

We progressed to playing “The Worst Chore” game. Everyone writes their least favorite chore and why they dislike it so. Then the host reads the answer by saying “Julie hates sex because….” Some of the answers were “It’s never my mess” and “it always takes too long.

To wrap up the games we of course played toilet paper bridal gowns. How can you not right? It’s just what you do. Unfortunately for the guests, the pregnant host (me) forgot to bring the game prizes. Pregnant brain maybe? Well it was fun despite that and no one complained about missing a prize. 

All in all, it was a success. We enjoyed playing housewife.

Registry Card